Homemade Cocoa-Orange Calendula Lotion Bars
NOTE: In this article, I share one of my favorite recipes for soothing, healing, hard lotion bars. These are excellent for super dry areas on your body such as cracked heels and elbows. Step-by-step directions and quality ingredients will get your dry skin softened in no time! Homemade lotion bars also make terrific gifts!
This time of year, it HURTS to walk sometimes! Not because I'm out running errands all day, but because my heels are so cracked and dry! OUCH! Do you have this problem too? How can a girl (or guy) soothe, support, & heal cracked and sore fingers, heels, elbows and skin?
I've got a solution: Here is a recipe for my herbal hard lotion bars made with deliciously-scented and highly moisturizing and nutritious Cocoa Butter, Calendula, and other natural ingredients meant to get rid of those cracks in heels, elbows, knees, and other dried out areas!
These are great to use on your hands and body too. Plus, these Cocoa-Orange Lotion Bars are SO easy to make! If you put the hard lotion into push up lotion tubes or bars in cute shapes, you’ll have some much appreciated gifts or stocking stuffers for friends & family! Enjoy!
You might also enjoy my recipe for Super Soothing Lavender Salve, or perhaps you want to make a “real” homemade lotion? Try my Calendula-Rose Lotion. It smells amazing and your skin will just love you for it!
This FREE Herbal Remedy Guide covers 10 commonly found herbs and includes home remedies for each. There’s also a cheat sheet to help you know at a glance what to do for different ailments. Get your guide sent to your inbox now by clicking here! :-)
FTC Disclosure: There are affiliate links scattered around this article. If you click through and make any kind of purchase, I may receive a small commission at no extra cost to you.
Calendula and Rose Lotion Recipe and Tutorial
How to Make Cocoa-Orange Calendula Skin Healing Lotion Bars
**A quick note about Cocoa Butter. Unrefined Cocoa Butter smells DIVINE...just like chocolate. However, some people think it's too strong. If you are creating these for a person who is sensitive to scent or doesn't like the smell of chocolate, just use Refined Cocoa Butter instead!
Ingredients for Cocoa-Orange Calendula Lotion Bars
2 Tbsp. unrefined Cocoa Butter
2 Tbsp. Calendula Infused Sweet Almond Oil (Or just plain Almond Oil is fine)
2 Tbsp. Organic Beeswax
12 drops Wild Orange Essential Oil
**NOTE: A quick note about Wild Orange Essential Oil--Wild Orange Essential Oil is a wonderful EO for uplifting the mood and it mixes beautifully well with the Cocoa Butter! However, like most citrus essential oils, it may cause photosensitivity if you are planning on going into the sunlight with exposed skin after using it.
Although I've never had a problem with it, this concern bears mentioning. You could substitute with Tangerine Essential Oil, and you won't have the sensitivity concern.
**Another quick note about Calendula--It's not necessary to use Calendula infused oil to make your lotion bars. You can use regular Almond Oil.
However, with that said, Calendula provides SO many benefits for your skin, including softening, soothing, anti-inflammatory powers, and more. It's just a super nutritious herb for your skin. It also adds a pretty yellow color to your lotion bar!
**How to Make Herbal Infused Oil Using Calendula Petals and Oil:
It's super easy to make herb infused oils for lotions, soaps, and salves. For the Calendula infused oil, you'll need to get some Calendula Petals and fill a jar about 1/3 to 1/2 full. I use dried petals when infusing in oils because mold can form otherwise. Fill the jar to within an inch of the top with your oil. Then set in a sunny window for about four weeks.
There is a faster way to infuse your oils if you don't have time to wait, and you can find out more about infusing herbs in oils in this article.
If you REALLY don't have the time to infuse your own Calendula Oil, you can buy it from Amazon here.
Tools You'll Need to Make Lotion Bars
1) Molds
I prefer cute, small silicone molds. For lotion bars, which I find are more useful in a small size, I like to use the Wilton small candy molds. You can make them larger, if you want more of a whole body lotion bar--just get a larger mold!
You can also use a push up container, like these from Amazon. These containers are super handy and keep your lotion bars clean!
2) A double boiler set up.
I just use a Mason jar (pint size for these) and a pan. Directions for use are below!
Here is the combination of beeswax, calendula infused almond oil, and cocoa butter in the Mason Jar double boiler---It's just starting to melt!
This beautiful 12 page guide on 10 common herbs is perfect for your home apothecary or kitchen! Start making your own home remedies today! Click here to get yours in your inbox now.
You’ll LOVE making your own handmade herbal soaps! Better for skin, your family, and the world….
Directions for Making Cocoa-Orange Lotion Bars
Step 1) Measure out the Calendula infused Almond Oil, Beeswax, and Cocoa Butter into a Mason Jar or other double boiler set up.
Step 2) Fill a pan with about 1 1/2 inches of cool water.
Step 3) Place the Mason jar in the water and turn the heat to LOW
Step 4) Allow the heat from the water to melt the oil, butter, and wax together.
I swirl the mixture around occasionally to help it melt more quickly.
Step 5) Once melted, remove the jar of liquid mixture from the pan and place on a heat resistant surface.
Step 6) Wait a minute or two for the mixture to cool just a little, but not start setting.
Step 7) Add your essential oils and swirl well to mix or use a utensil to mix it up.
Step 8) Pour into your molds and don't disturb until completely set. If you are using a push-up tube, the same applies--just don't disturb!
Step 9) Once your lotion bars are completely set up and hardened, you can easily pop them out of the mold!
Step 10) Package them if you want!
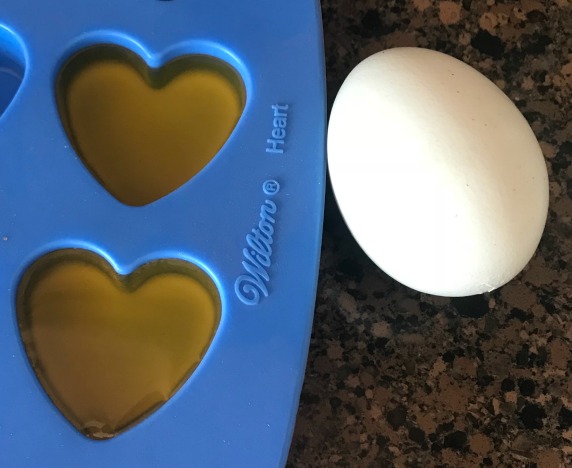
**This recipe will make three small lotion bars (see picture with the egg comparison below). If you want to make more or a greater amount for the push up tubes, then just increase the recipe accordingly. The push up tubes hold about an ounce of product, and that's probably about two of these lotion bars, in my estimation.
Here are some ideas for packaging:
**You can make several and put them in a pretty small jar to gift or keep for pretty storage.
**You can just put them in the push up tubes and wrap the tube with pretty paper if you are gifting.
**One small lotion bar fits perfectly into a two ounce tin! These are fun to give this way, if you are just giving one at a time!
This picture gives you an idea of the size lotion bars this recipe makes. I made three of these little hearts, and you can see they are a bit smaller in length than a large egg. They're the perfect size for small dry areas or small hands for children.
Ready to make your own homemade natural soap? Check out my soap making online course that includes step-by-step videos and a digital book too!
Final Thoughts on Cocoa-Orange Lotion Bars
Cocoa and Orange together is one of my very favorite scent combinations! Since essential oils do not ever come in a cocoa scent, and I will not use fragrance oils, using unrefined Cocoa Butter does the trick!
So...Come ON, dry heels! These amazing handmade lotion bars will vanquish you! I'm ready now!
Here's how you use hard lotion bars for dry heels and other chapped areas:
For heels, I rub the bar onto them really well, then put on some fuzzy socks while the oils are absorbed. My favorite fuzzy socks are the kind with Aloe Vera gel for extra moisturizing.
For other areas, I just rub the bar lightly across my skin, then rub in to absorb. The heat from your body will melt the lotion bar just the right amount for what you need. It's really hard to get too oily from these!
I'd love for you to leave a comment! These days, I'm wracking my brain for gifting idea combinations. One of the combinations I thought about is a set of these Cocoa-Orange Lotion Bars with a matching sugar or salt scrub and fuzzy socks! What other ideas do you have?
You might also enjoy these related articles:
There's LOTS more on the blog, too! :-)
Hugs, Health, & Self-Reliance,
Heidi
P.S. If you haven't done so yet, please sign up for our newsletter and never miss a thing! You'll get information not found on the blog, PLUS you’ll get immediate access to the Resource Library, where you’ll find eBooks, guides, and other resources for your self-reliance and natural living life!
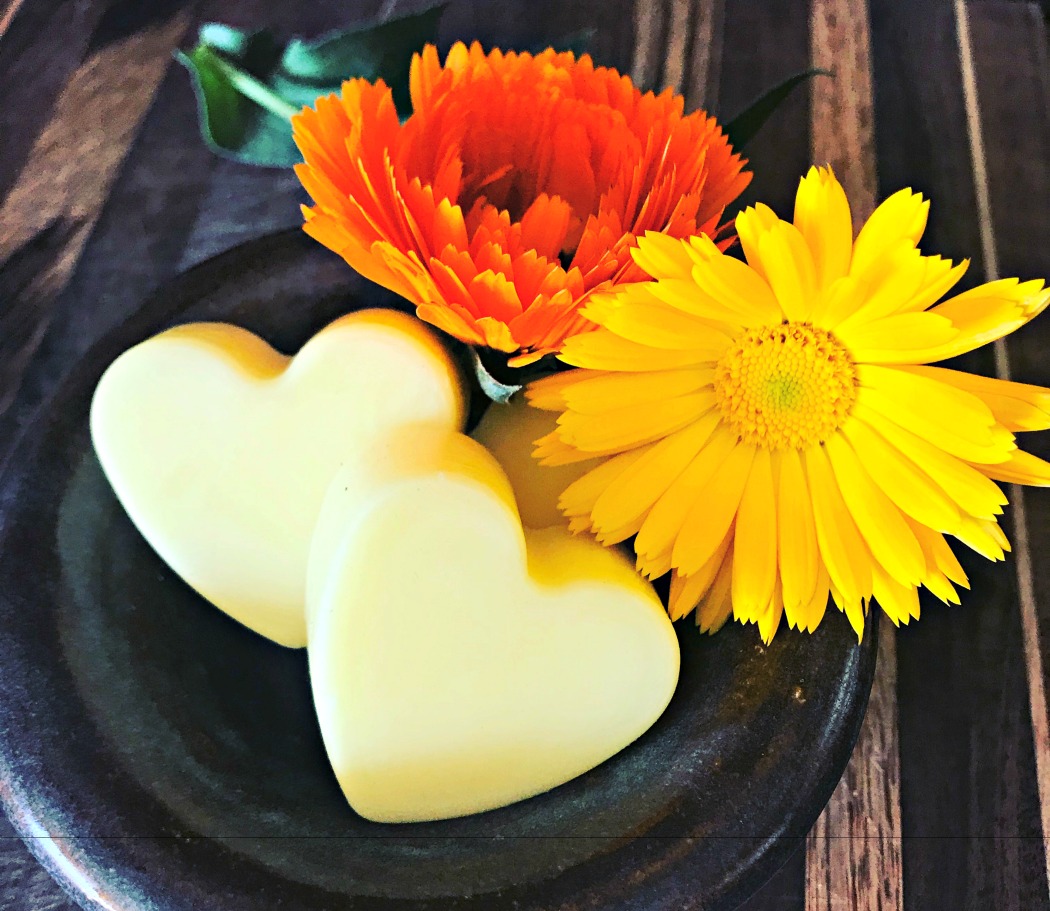
Don't these look good enough to eat? Well, I can tell you they SMELL good enough to eat! :-)
Want to save this? Pin the image below for later! :-)
These sweet little hard lotion bars make perfect gifts this upcoming holiday season! They are simple to make and super effective on dry, cracked skin. They smell amazing! The perfect solution for working hands, dry heels and elbows, and perfect for cuticles. My husband even loves them. This lotion bar recipe needs to be in your repertoire! #healingharvesthomestead #lotionbar #howtomake #diy #handmadegift #healing #skin #recipe #directions


