Making Soap Without Using Lye: Melt and Pour Guide!
Can you make handmade soap without using lye? Here are the answers:
When I first became interested in making soap for our home, I was worried about using lye. It's caustic, extremely poisonous, and very dangerous if it's not used correctly. The biggest question on my mind was, "How can I make soap without using lye?" Therefore, I researched every single way possible to make soap without lye. What is the answer to the question, "Can you make soap without using lye?"
The simple answers are: Both yes. And no.
As a beginning soap maker, being afraid of using lye is a common (and valid) fear. If you choose to start creating hot process or cold process soap using lye, you'll be fine if you just follow basic safety guidelines, which you can find in this complete tutorial: How to Make Hot Process Soap.
However, if you don't want to bother with using lye at first, while you make sure making soap is something you really want to do, then using a method called Melt and Pour soap is a great beginning option that still allows you to customize and create your own soap with additives like herbs, clays, seeds, and essential oils.
It's a great way to get started making and experimenting with your own handmade soaps. Using melt and pour soap bases is actually the way I began my own journey into making our own soaps. Read on for step by step instructions!
**You may also be interested in these soap making articles:
How to Make Your Own Hot Process Soap: A Picture Tutorial,
Cold Process vs. Hot Process: Which is Better? and LOTS more about soap making on the blog!
NOTE: Get my Melt & Pour mini eBook with recipes and ideas so you can make your own beautiful melt & pour soaps right away! Just complete the form at the end of this article!
First: Why is Lye Necessary to Make Soap?
Let me explain.
ALL soap (true soap, that is), is made using a lye solution and oil(s).
The lye solution chemically changes the molecular structure of the oils so you end up with soap! It's pretty cool, actually. Even the FDA has very strict rules about what can be labeled, "soap." For it to be TRUE soap, lye must be involved in order to saponify the oils and create soap. Period.
**NOTE: You don't see a whole lot of "real" soap in the stores! Go check out the so-called "soap" aisle. Most are called "cleansing bars," or "beauty bars," etc., all euphemisms for blocks of gruesome chemicals. Check out this article, "Killer Toxins Lurking in Your Soap" for more information!
So...how can you make real soap without lye?
Well, you can take a little short-cut! It's called using Melt and Pour Soap.
You simply purchase large blocks of ready made REAL soap that have been specially processed to melt very easily, melt it on down, add whatever additives you like, and you have your own soap creation!
NOTE: Melt and pour soap has previously been made using lye, plus the additives to help it melt easily and smoothly. But YOU don't have to have anything to do with the lye and oil saponification process because it's already been done for you! Yay! Right?
The benefit to starting out with Melt & Pour soap making is being able to try out soap making easily. You'll be able to decide if it's something you want to pursue for real, without having to be concerned with dealing with lye. You can be as creative as you like, and get a feel for whether or not making your own handmade soap is something you'll enjoy.
You get a feel for the kinds of additives you love, and the kinds of scents you like. You can even change the composition of the melt and pour soap a bit by adding clays, salts, honey, etc.! Pretty cool, right?
AND...it's an easy enough project for kids to help with! Here are the steps my grand daughter and her friend did with a little help from me to make their own melt and pour soaps. **As a former elementary school teacher, this would make a fun and easy classroom project for gift giving too!
FTC Disclosure: There are affiliate links scattered throughout this article. If you click through and make any kind of purchase, I may earn a small commission at no extra charge to you!
(Get free mini-eBooks and checklists for making soap (including my guide for melt & pour soap Plus recipes by completing the form just above!)
Steps for "Making Soap Without Lye" (Even a Child Can Do It!)
I love melt and pour soap making because you can let your creative freak side fly without worrying about the lye!
You can get the free Guide to Melt & Pour Soap Making Basics (with Recipes & Ideas) in the Healing Harvest Homestead Resource Library. To get it now, just fill out the form at the end of this article or just above!
Here are the directions for making soap without lye (Melt & Pour):
Step 1) Cut Up the Block of Soap
If you are doing this project with kids, you'll probably want to do the cutting for them, unless they are older and proficient with a large knife. You'll need to cut the block into approximately 1 inch cubes.
**Where do you get Melt & Pour Soap Base?
You can find it at good craft stores, but I'll be honest: I don't recommend those blocks of soaps. The quality is just not that great, and they will cost you more, too.
When I'm making Melt & Pour soap, I buy mine from Amazon. They have lots of choices, ingredients, and sizes too. Plus, the price is right! Here's a Honey Melt and Pour soap to take a look at! Lots of people love Goat's Milk Soap, too! There are many other choices as well.
Step 2) Get Your Double Boiler Ready
For the melting part, you'll need a double boiler so the heat on the bottom of the pan isn't too intense on the melting soap. I have a double boiler pan I use for this kind of soap making, but if you don't, and you're not making a huge amount of melt and pour, here's another way:
You can actually use a Mason Jar set into a pan with an inch or two of cool water. Heat it gently, and your soap will melt just fine! Keep the heat set to a little above low so you don't crack your glass. If you are using a Mason jar set up as your double boiler, I probably wouldn't let the kids help with this part---just in case. Just my opinion.
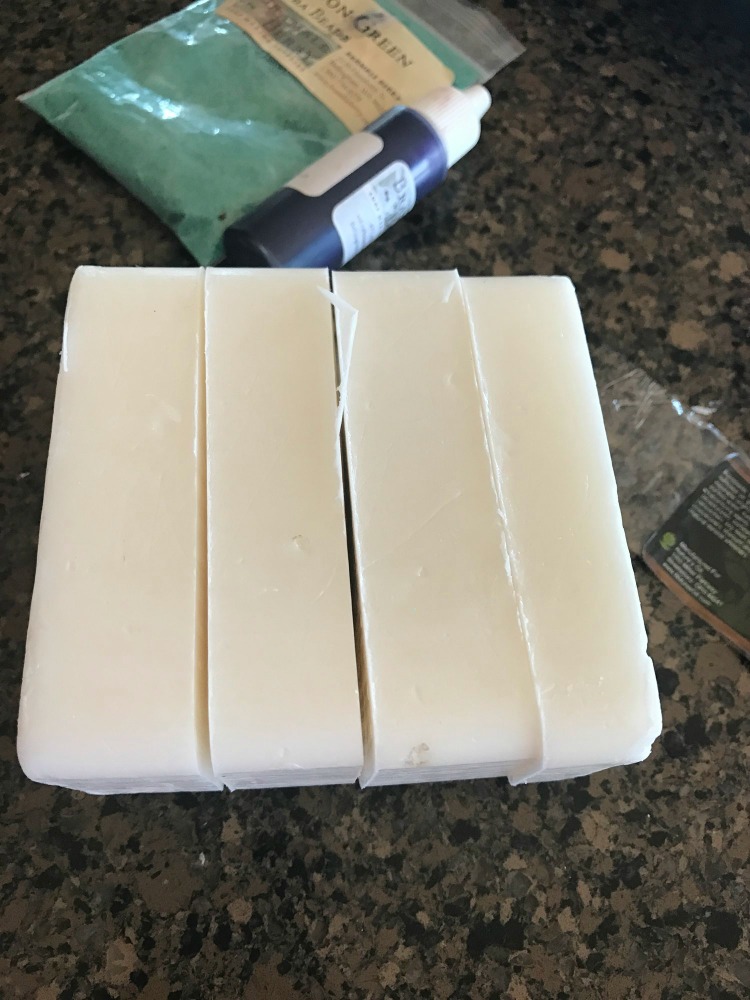
Here is a 1 pound block of goat milk melt and pour soap base, cut into strips. Now I'll cut these into 1 inch cubes for easier melting.
This step-by-step video and print material course (that even includes my popular 93 page complete guide to soap making that’s been downloaded by thousands) will get you started making real, natural, handmade soap you can be proud of! Click here for the deets!
Here is my grand daughter---We are making melt and pour soap! This is a great project to do with kids of any age.
Step 3) Melt It Down
Gently stir your soap cubes as they melt down--it will go a little faster. You'll be surprised how fast melt and pour actually melts! I always am!
Step 4) Add Your Color & Scent
Once your soap is melted down, you can add your colorant and scents. Follow the directions if you are using some kind of dye for soap. I prefer to use natural materials like clays or powdered herbs. For one pound, start with about 1/2 tablespoon, then make adjustments until you're happy with it.
Here's an article about using natural colorants in your soap, and here is some information about the best essential oils to use in making your soap.
What about scenting your soap?
For scents, I prefer essential oils. You don't need a whole lot for one pound of melt and pour soap---I'd start out with 1/2 tablespoon of total essential oils per pound of melt and pour base.
For making soap, I buy my essential oils from Starwest Botanicals because you can buy enough quantity at a reasonable price---and they are still excellent quality essential oils.
If you choose to use fragrance oils (I don't use these because they contain toxic chemicals), just follow the directions. Either way, start with a small amount, then adjust until you like it! It's easy to get too much scent, so be conservative at first.
Where do I get my colorants?
I buy my herbs at Starwest Botanicals, and I either powder them myself or buy them powdered. You can also purchase a variety of clays from Starwest too. I've written an article about coloring soaps naturally, if you want to take a look at that!
Clays are always great! If I don't get them from Starwest, I buy from Amazon. Here is French Pink Clay!
Mix the ingredients in really well! You don't want lumps of herbal powder or clay, and you definitely want your essential oils mixed in well, too.
Don’t forget! Complete the form at the end of the article to get your free Guide to Melt & Pour Soap Making Plus 5 Easy Recipes you can make right now!
Step 5) Pour into Your Soap Mold
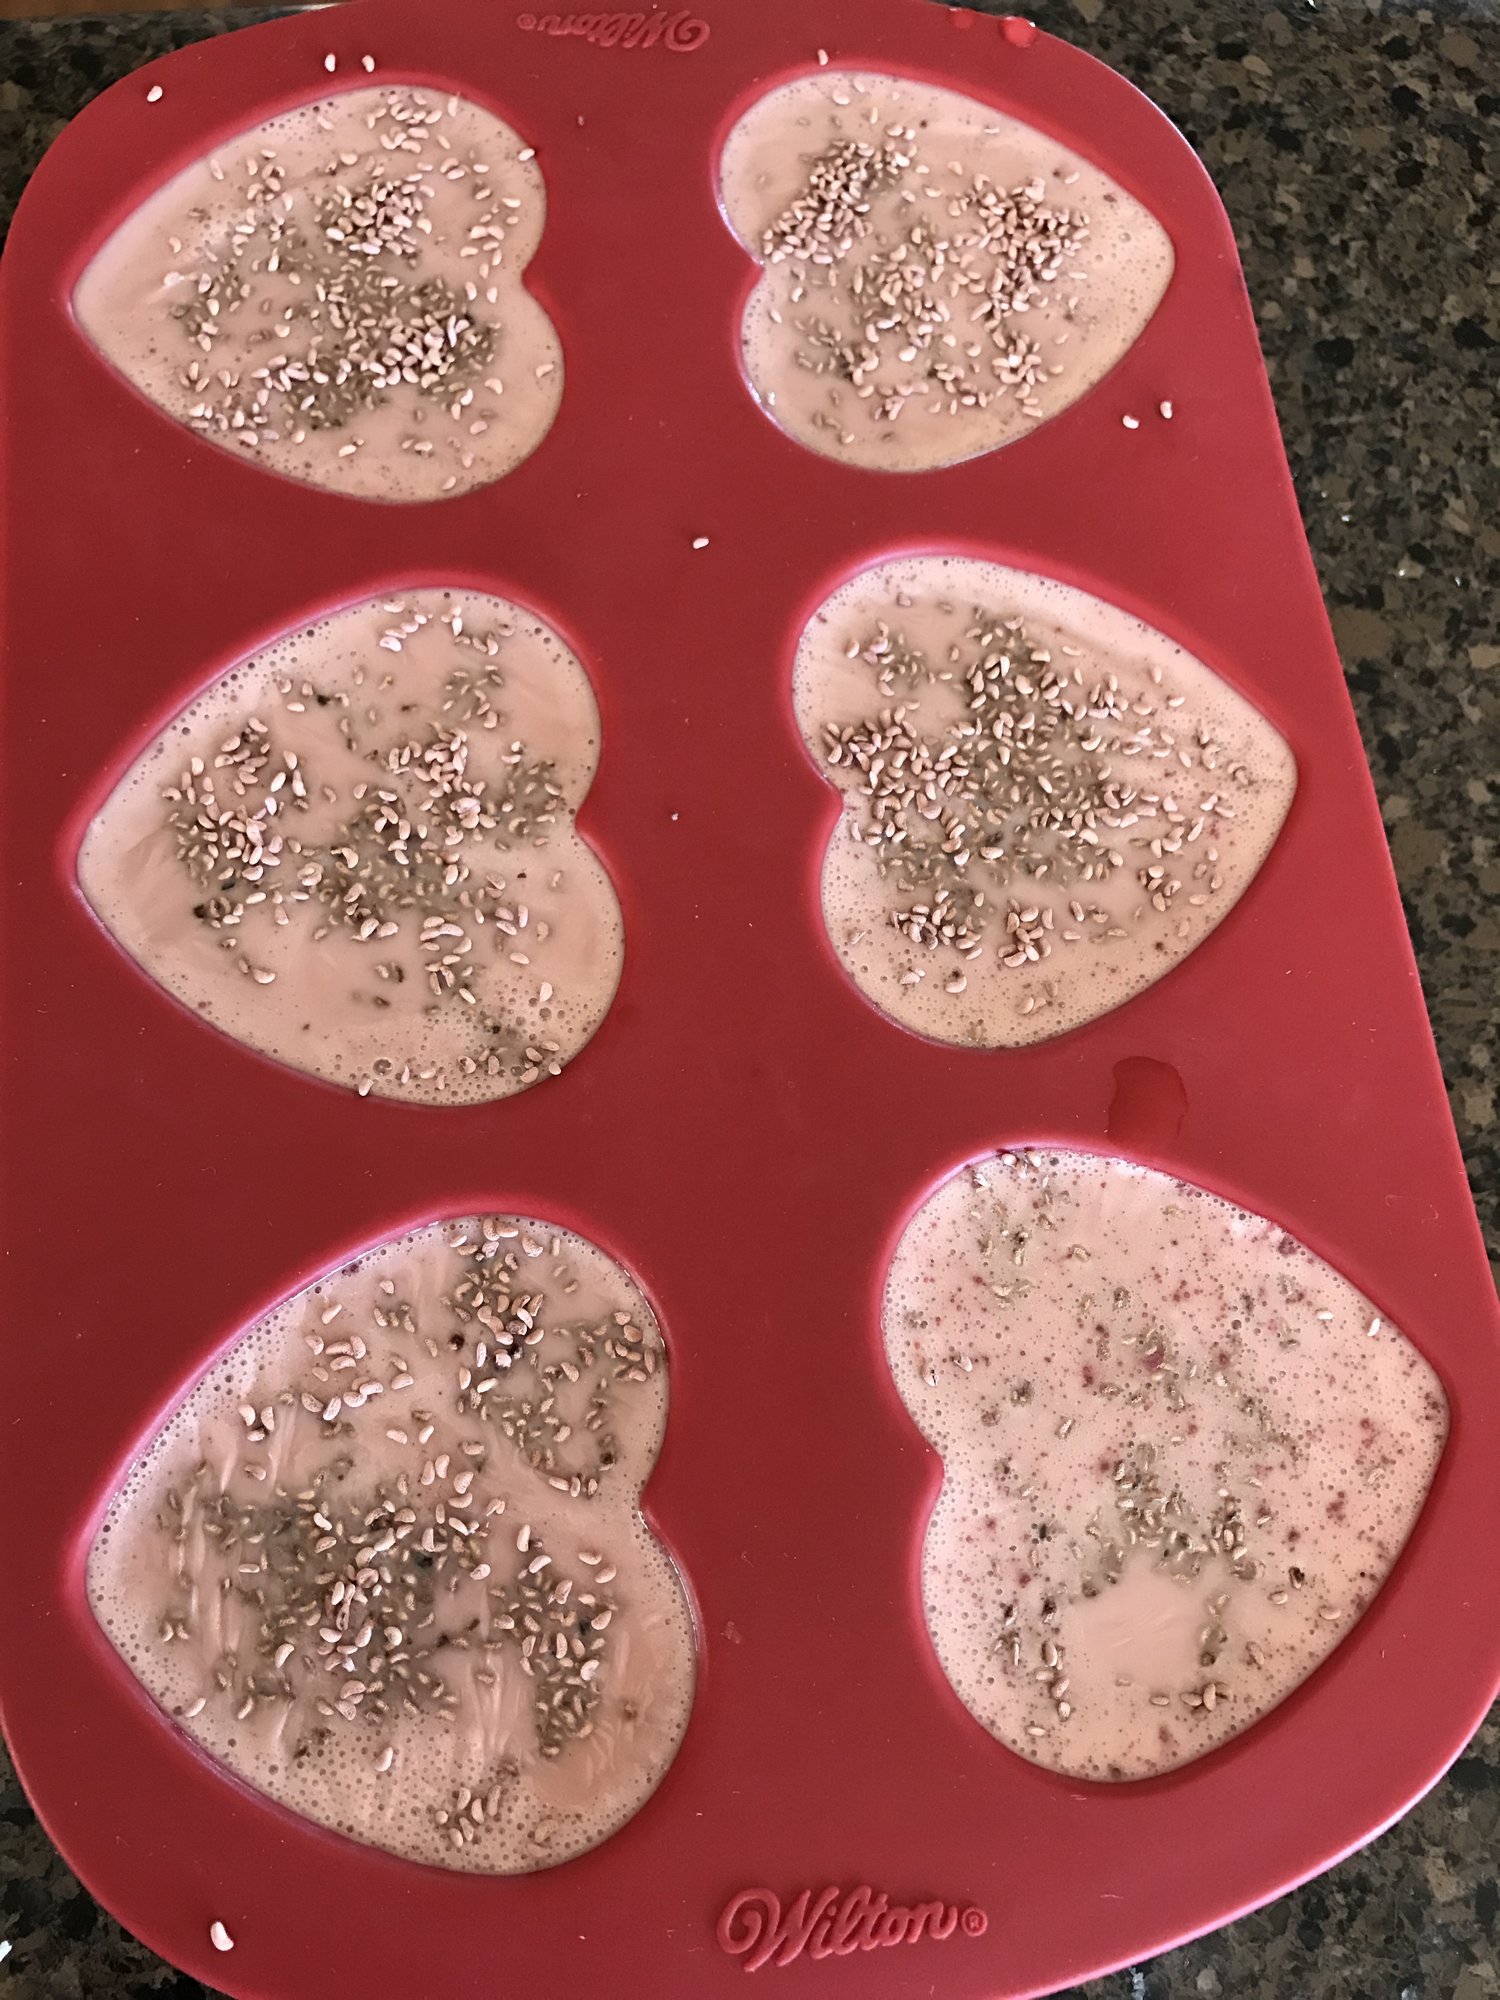
Just pour in your liquid soap and leave it alone until it's completely cooled and set--at least a couple of hours to be on the safe side. We decided to sprinkle some raspberry seeds on top of this soap!
Step 6) Spritz the Tops with Alcohol
This will help get rid of any bubbles that come to the surface of the soap—-which can affect the appearance.
Here is some goats milk soap with French pink clay and raspberry seeds added.
Here are the essential oils I used for one of these soaps.
This is a honey based melt and pour soap that is translucent. It makes a lovely soap, especially when you add flower petals, like Calendula.
By the way, would you like to learn how to use herbs safely and effectively for your health and your family’s benefit too? Start making your own home remedies today in the FREE 5-Day Herbal Foundations email course!
Step 7) Remove the Soap and Enjoy!
Allow your soap to cool down completely. Also don’t move it while it’s cooling because you could get a wrinkled top—-that’s not good.
I like to use silicone soap molds for melt and pour soaps because it's so easy to remove the soap when it's cooled down! You're all ready to go with practically instant home made soap!
Here are the finished soaps! Beautiful!
Final Thoughts on Making Melt & Pour Soap
You know what? I was SO bummed when I found out you really can't make handmade soap without using lye. But that's ok. I decided to make melt & pour soaps first, and that just got me hooked on making handmade soaps!!
I loved the creativity I could have, even if I wasn't doing it the "hard core" hot process or cold process ways. Trying melt and pour soap making got me started on my soap making journey. Now I make both hot process and cold process soaps!
And as a great project to make with kids? My grand daughter and I had a blast doing this project, and everyone LOVED the soap! She is coming for another visit next week, so we will probably be making up some more!
Have you ever tried making soap with kids? Or tried melt and pour soap? What is your favorite style of making soap? I'd love to know what you think! If you try Melt and Pour with your kids, how did it go?
Leave a comment, share an experience, or ask a question in the comments section! :-)
And…you might also enjoy these related articles:
Cold Process vs. Hot Process Soap Making
Sexy Wild Man Natural Soap Recipe (One of my most popular soaps I used to sell!)
How to Make Hot Process Soap: A Picture Tutorial
Melt and Pour Soap Making: More Information
Hugs, Health, & Self-Reliance,
Heidi
P.S. I hope you'll sign up for our weekly newsletter and never miss a thing! You’ll gain immediate access to the Healing Harvest Resource Library that’s filled with downloadable printables, eBooks, checklists, and guides for your soap making, essential oil and herb uses, and homestead skills! The Guide to Melt & Pour is there, too! Just complete the form:
Want to make your own hot process handmade soap with confidence and joy? Click here for more information!
Want to make your own handmade soap but are worried about using lye? That's a common fear about soap making many have when they are first beginning to learn to make soap. So....can you make soap without using lye? The answers are: Yes. and No. Find out the ONLY secret to making handmade soap without using lye here. #melt&pour #meltandpour #easyhandmadesoap #soapwithoutlye #howto make #homemadesoap #naturalsoap #meltandpoursoap #withoutlye #soapmaking #naturalsoap #healingharvesthomestead


